Before you start using ATOM, you’ll want your client database loaded. This guide walks you through exporting your client list from your tax software, using ATOM’s templates, and securely uploading your file.
Step 1: Get the Right Template #
If you use Drake, Crosslink, or TaxWise, we’ll send you custom instructions.
For all other tax software:
- Go to www.atomanager.com
- Scroll down and click Document Downloads
- Download the Individual and/or Business client templates
Do not delete or rename any of the column headers in the template, even if you don’t use them.
Step 2: Export from Your Tax Software #
- Export your client information into a CSV or Excel file.
- Copy/paste the data into the ATOM template you downloaded.
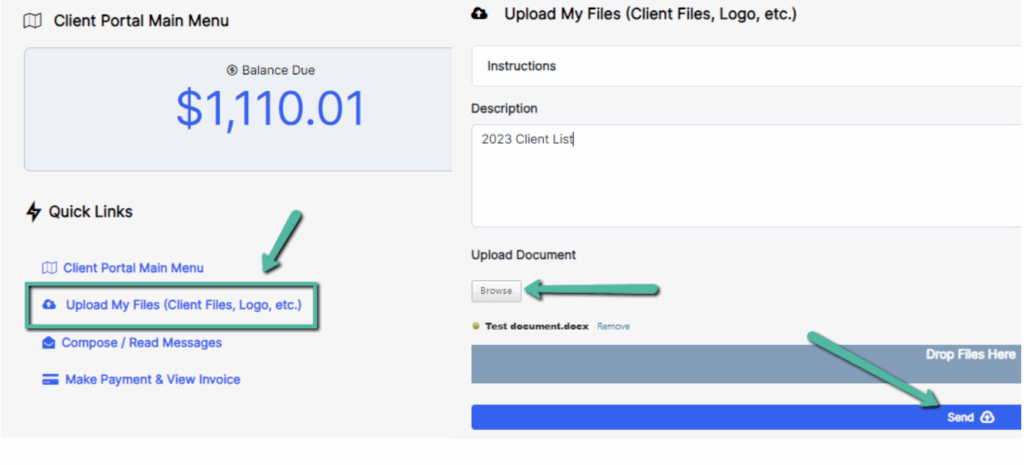
Step 3: Upload Through the Client Portal #
- Log into the ATOM Client Portal with your ATOM Code, username, and password.
- Click Upload My Files.
- Drag and drop (or browse to select) your client list file.
- Add a brief description (example: 2024 Client List).
- Click Upload.
Please do not email your client list. The portal is the only secure method.
Once uploaded, our programming team will load your clients into your ATOM site so you can begin working right away.
Need Help? #
If you run into issues:
- Portal: Login Here
- Email: atom_software@parse.atomanager.com
- Phone/Text: 517-940-8745